
Table of Contents
If you want to know how to digitize and vectorize your hand lettering in Illustrator, I’ll walk you through exactly how to do it—with a pixel-perfect method using the Pen Tool!
By using the pen tool, you can create polished lettering pieces that can be translated into logos or can be blown up to any size imaginable without losing quality. A “polished piece” means crisp edges, sharp corners, and uniform thicks and thins. It means parallel lines, regulated sizes. Working with the pen tool can create a variety of effects, some of which look more hand drawn than others, but usually the level of perfection is much higher when using this technique.
In this tutorial, I’ll show you how I use the pen tool in Illustrator to digitize hand lettering projects and take a quick doodle to a finished piece.
Keep reading to get the full tutorial!
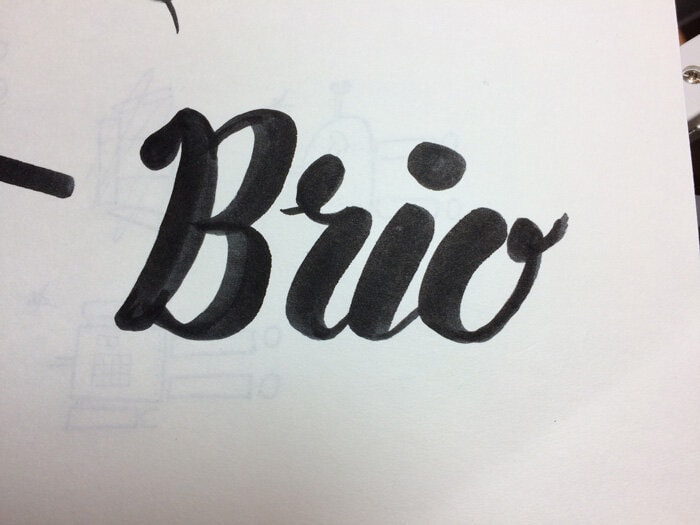
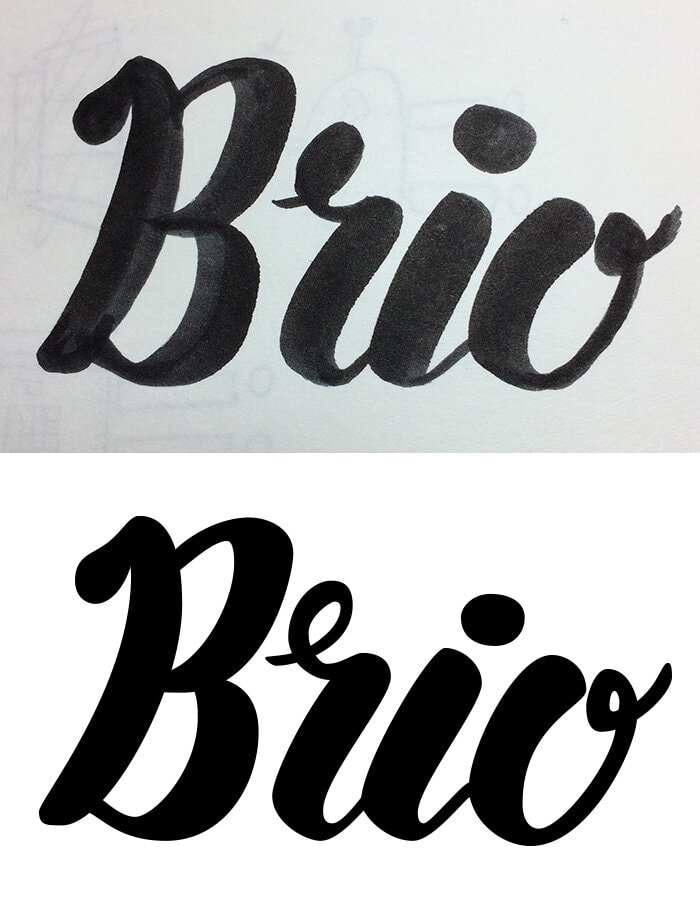
In this post, I’ll show you how to take a quick doodle…
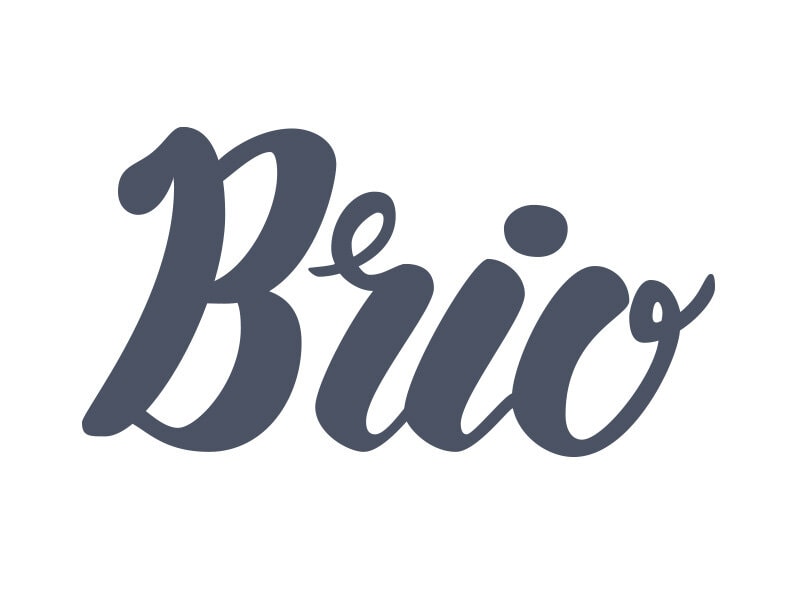
To a finished, vectorized hand lettering piece like this!
A Quick Overview of Illustrator’s Pen Tool for Digitizing Hand Lettering
A while back, I published this video below to show how I use the pen tool in Illustrator. It’s super sped up, but it gives you the idea of the overall process!
While it’s a very quick video (I think it’s at 20x speed), it can be helpful to watch before and after reading this tutorial, as some of the things you’re seeing will make more sense after you read the logic and methods in this post.
You can see how using the pen tool captures the essence of the hand lettering project but adds more polish and allows for you to push and pull the lines as you please, and you can play with color.

Step 1: Import Your Original Sketch as a Photo in Illustrator
Take a photo of your hand lettering piece that you wish to digitize. It doesn’t have to be a great picture; it can just be taken with your smartphone and imported into Illustrator.
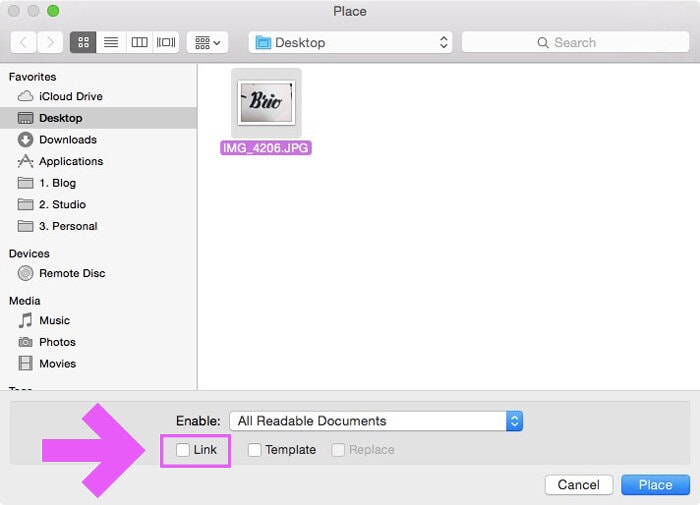
I’ve created a new document at 800x600px so it’s Dribbble-friendly.
When you Place your image in Illustrator, go to File > Place… and make sure to uncheck the Link button so that the image gets embedded in your AI document. This makes it so your AI file can stand alone and you can delete or move the original photo without losing the link.
If you need to doctor it up in Photoshop so it’s easier to see, use Steps 1 and 2 from this post.
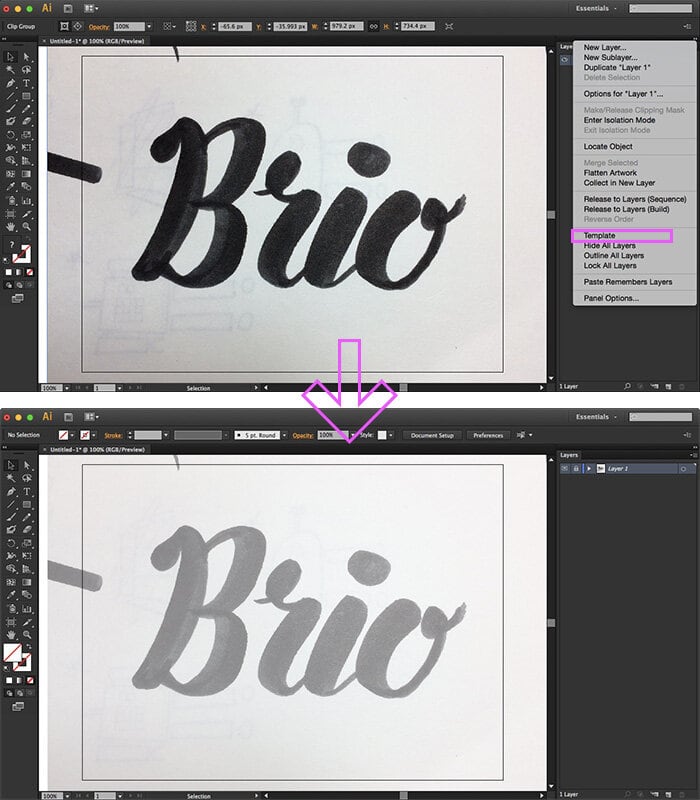
Once your drawing is in Illustrator and is positioned and sized to your liking, set the photo to Template so it locks in the background and fades it out a little, so you’ll be able to see your drawing on top of your photo more clearly. Do this by selecting the layer in the Layer Panel, then choose Template from the drop-down menu.
Step 2: Think About Your Project Before You Begin Tracing with the Pen Tool
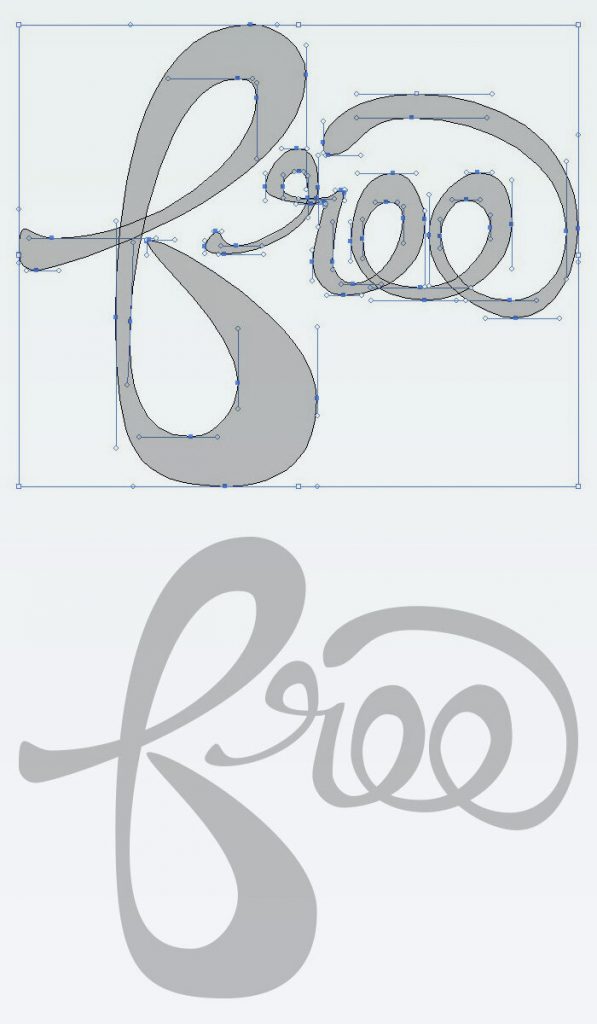
There are two main tips with using the pen tool to trace your lettering:
-
Only use an anchor point at the topmost, rightmost, leftmost, and bottommost points of any curve.
-
Only use horizontal and vertical handles.
You can see this method from another project of mine here:
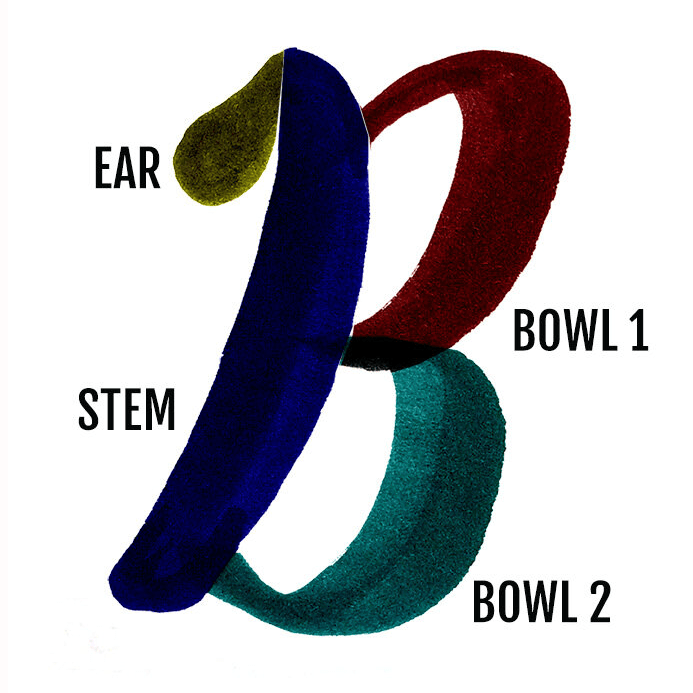
Take a look at your word and see where the natural break points are.
You may end up with a better result if you draw a letter in two or more pieces. These natural break points usually occur where you would pick up your pen when working on paper.
For example with the B, I will break it up into four parts: the main stem, the two bowls, and the ear.
Step 3: Trace the Outlines of Your Letters with the Pen Tool
Choose a bright stroke color and set the fill color to transparent, so it’s easier for you to see the edges of the original work. (Make sure to add a new layer on top of your Template layer so you can draw.)
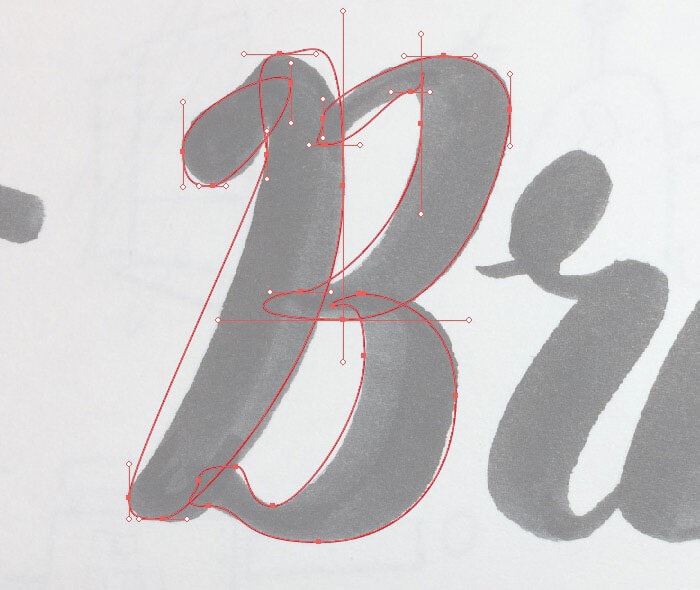
Trace one section at a time. When you click to place an anchor point, hold down shift to drag out the handles at perfect horizontal or vertical angles. Don’t worry too much about perfecting your handles as you go; you can fix them after you have the entire shape drawn and the loop is closed.
(To prove to you how you don’t have to worry about handles right off the bat, here’s my first stab at the B before fixing the handles)
After you’ve drawn each letter, pause to adjust the handles with the Direct Selection Tool (A).
Now it’s looking a little better. (Remember to hold down shift so your handles stay perpendicular.)
Continue tracing the borders of each letter following the anchor and handle rules until you’re finished.

Step 4: Solid Fill and Adjust Your Letters
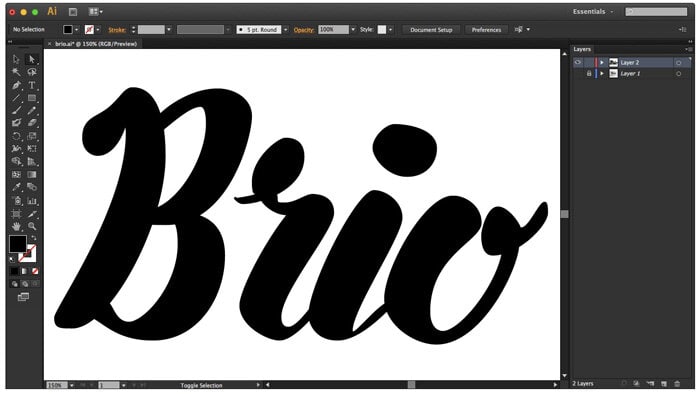
Now you can change your drawing to a solid fill and hide the background so you can see your work by itself.
I recommend setting the fill to black, stroke to transparent so you can see your work in a clean environment after you’ve hidden your Template layer.
There are quite a few things here that I’m going to fix.
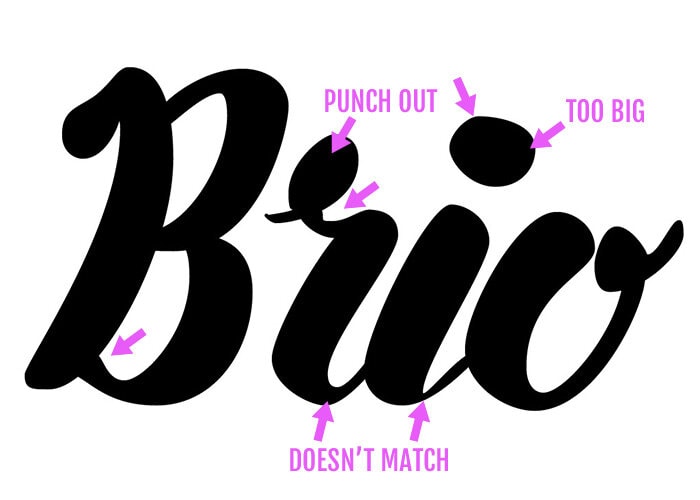
Most of these fixes are just adjusting the anchor placement or handlebars.
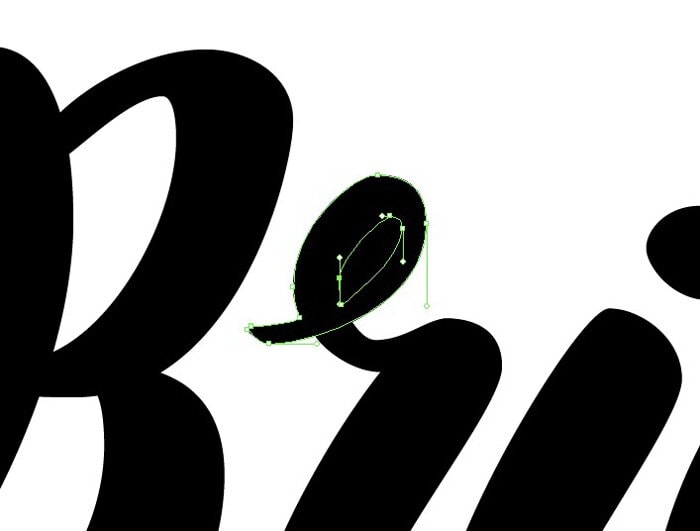
For the punch outs needed on the R and the O, simply draw the desired punch out with the pen tool on top of your layer. Then, with the Selection Tool (V) select both the letter and the punch out.
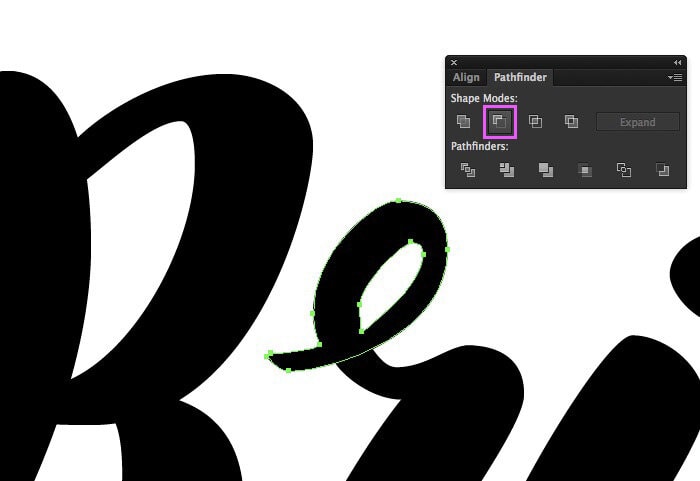
From there, open the Pathfinder window from the Window menu, and then select the Minus Front button. The punch out will disappear, leaving you with your loop that you can edit further by tweaking the handles and anchor points.
Step 5: Keep Playing Until You’re Content
As you’ll quickly find out, playing with the handles and anchor points can turn into an obsessive game of push and pull. But the more you practice, the faster you’ll get.
Here’s a final look at the adjustments made between Step 3 and Step 4. Not the most drastic change I’ve experienced but still different.
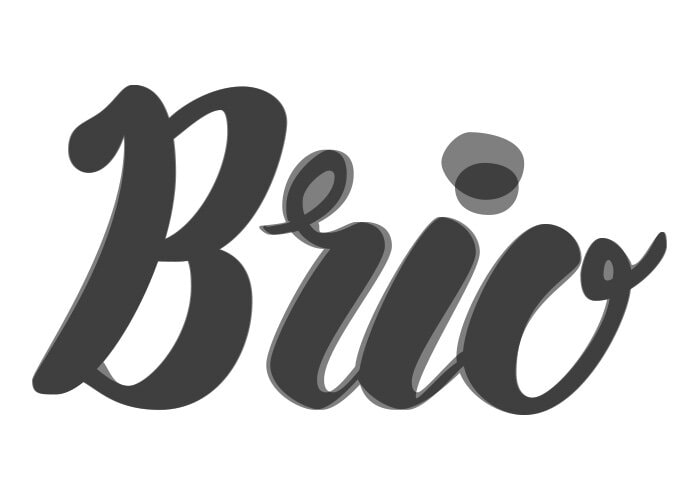
Your Final Digitized Hand Lettering Piece in Illustrator
You’re done!
Thanks for reading and following along! Comment below with any questions.
5 Comments
-
You’re so awesome! I don’t believe I have read a single thing like that before. So great to find someone with some original thoughts on this topic. Really.. thank you for starting this up. This website is something that is needed on the internet, someone with a little originality!
-
I do not even know how I ended up here, but I thought this post was great. I don’t know who you are but definitely you’re going to a famous blogger if you aren’t already 😉 Cheers!
-
Cool that really helps, thank you.
-
I just like the helpful information you provide in your articles
Lexitoto
Cool that really helps, thank you.