Table of Contents
If you’re a newbie letterer, consistency is one of the hardest things to accomplish. Using guides is the way to help with that—and I’m not just talking about horizontal guides like on lined, graph, or dotted paper.
An angled calligraphy guide is the perfect way to make sure the tilt of your letters are consistent—meaning that all of the downstrokes of your letters line up at that perfect 30º angle.
Below is a video and instructions on how to make your own angled calligraphy guide. (Or, you can download and print the one I made to save yourself some time.)
Here’s a quick video showing you how to make your own angled calligraphy guide with a few simple tools:
- printer paper
- acrylic inking-edge 30/60/90 triangle
- pen
- ruler
- tape: washi, drafting, or masking tape
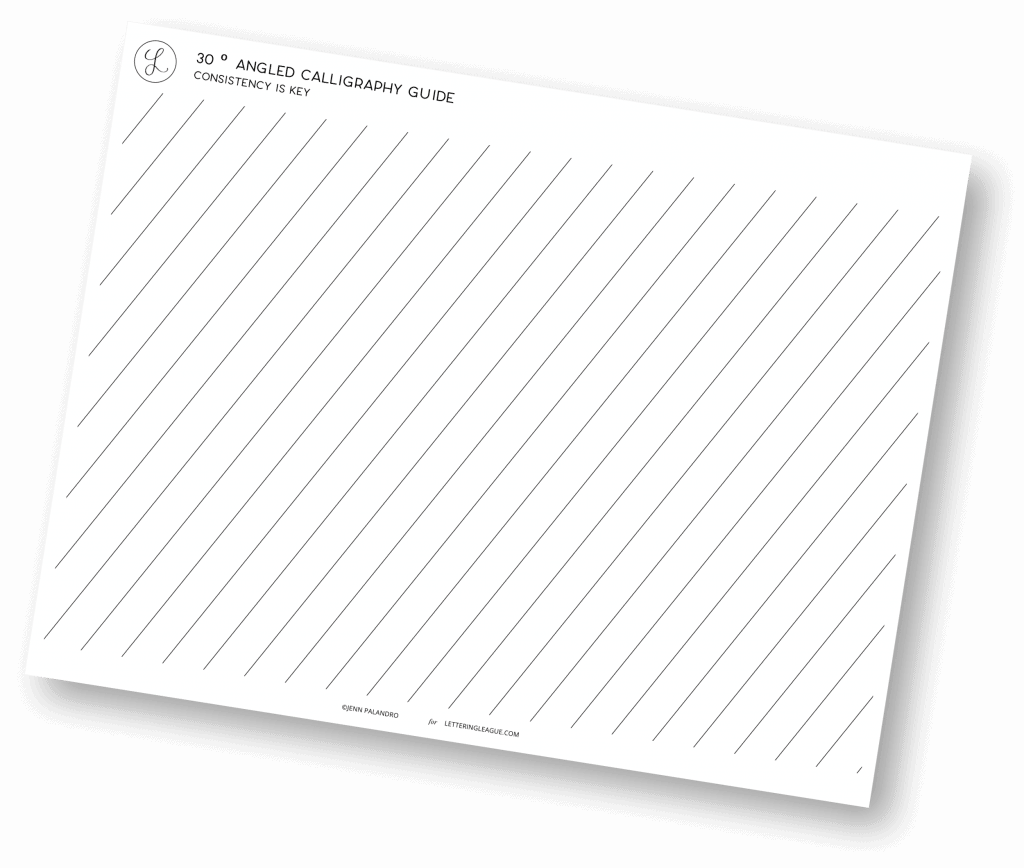
Don’t want to make your own? You can download my printable calligraphy guide. Just remember to use it under lined paper so you get correct and consistent letter heights.
So, watch the video at the bottom or follow along below.
This will result in an angled guide so you can practice your letters and work on consistency.
Materials Needed
All you’ll need for this is a piece of printer paper, a thin black inking pen (black is best so it will show through other pieces of paper (I’m using a Micron 02), a ruler that is longer than your paper, some drafting tape or tape that won’t damage your paper or writing surface, and an inking triangle.
Draw Your Guide
First, line up your paper with the edge of your desk and tape it down. Then, take your ruler and also line it up with the desk and tape it down. Then, take your triangle and line up the perpendicular edge with each half inch and draw your consistent angle at each half inch. Move from left to right so you can avoid smearing your work.
Remove Your Tape and Practice on Lined Paper
Because there are no horizontal lines on this paper, this is perfect for using it alongside of graph or lined paper so you can test out varying letter heights.
2 Comments
-
Greetings! Very helpful advice on this article! It is the little changes that make the biggest changes. Thanks a lot for sharing!
gralion torile
I am thankful that I found this blog, just the right information that I was searching for! .